Pages

Tuesday, February 5, 2008

A VINTAGE SEWING BOX


I found this sewing box, (I'll call it a box, as it isn't really a basket) some time ago at an estate sale. First I must tell you that I LOVE sewing baskets of any kind. It has become a joke in my family about Mother's sewing baskets! I use them too. I have them all supplied with the notions that might be needed and an ongoing project that I can work on. I can grab one if going away from home for any time at all, (even while I sit under the hair dryer at the beauty shop) and enjoy some time stitching.

But I found this one and decided since it is actually a box and not easy to carry around, I would sell it on eBay. So I listed it starting this evening for 1 week. Here are pictures of it that I want to share with all of you that enjoy sewing also.

Monday, February 4, 2008

More hats for eBay


I have changed styles and am now making velvet hats for antique dolls. Here are 2 that I listed on eBay today. I have more in the making. Oh, the first picture is another lace hat that was quick to make. Then the velvet ones. These are a little more work, as lots of hand sewing to finish them off, but they are fun! I'm using up some velvet (the stretchy kind) that I decided not to use with CQ. But it is perfect for the hats, as I can stretch it to fit whatever shape I want to.

I am trying to clean out and use up more out of my sewing room, as I have the goal in mind to have it all neat and orderly with eBay sewing fabrics & trims on one side and CQ on the other! So........... again, .............. we'll see!

February 5, 2008 February already!!


I have been really busy this past 3 or 4 weeks catching up on my sewing for eBay. Here are some of the things I have made. Here are 3 different lacy hats I have made for antique dolls. I made 6 and they are all sold already. So ......

Sunday, January 13, 2008

CHRISTMAS DECOR I HAVE MADE


I am going to post some pictures of a wall hanging and a Christmas card holder (like a bell pull) that I made in 2005. I took pictures of these before we packed the Christmas things up after Christmas.

The wall hanging is about 28" square. I especially liked the way this is decorated on each corner with fans and of course embellished. There is a silk print in the center. It is embellished before adding it to the wall hanging.

The card holder is about 10" across (including the ruffle around the edge) and about 48" long. It has 3 pockets to hold the cards we receive. Above each pocket is a silk print of something to do with Christmas. There is crazyquilt style piecing on the pockets and embellished of course. a row of beads is part of the embellishment under each pocket.

Both items have thin layers of cotton fleece like fabric inside so they will hold up nice. This too was fun to make, and someday................ I want to make one for each of the children and grandchildren! Of course!

CRAZY QUILT STYLE VALENTINE DOOR DECOR


This heart is a wall or door decor item. The basis is crazy quilt flower prints. It is embellished with seam treatments as well as lots of beads. I don't know how well you will be able to see them. I mounted it on a cardboard heart and then finished it with a ruffle of burgundy lace and a rayon trim as well as the off/white vintage lace border all around the edge. In the center is a silk print and is bordered with ribbon over each corner like you wrap a package. It is about 14" tall and 9" across. Fun to make!! and quick!! It is hanging on my husband's mother's door at her assisted living apartment. She is enjoying it.

January is 1/2 gone!

Time is marching on. Can hardly believe we are in the middle of January!! I do have some things to post.

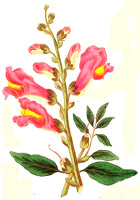
WHAT KIND OF FLOWER ARE YOU?


I am a
Snapdragon


What Flower
Are You?


Thursday, December 27, 2007

Wall hanging I made for Great Grandaughter


pm (PST)
My newest GGD was born 8/23/07. She lives near Houston, Tx. Therefore we
have not actually seen her yet, but have enjoyed 100's of pictures from her
parents online.

I wanted to make something for her to have all her years to come. So I made
a 28" square wallhanging of pink silk fabric. I put 36 oval printed on silk
pictures of the first 3 months of her life, beginning when she was just
minutes old! I embellished around each picture with different pink trims, and
then did a feather stitch all inbetween the pictures. It is green and there are
pink beads flowering from each stitch. A ruffle of the same pink silk with
pink/green/offwhite cording is the frame all around. I made a booklet and
wrote who I am and that I made this for her. I am getting older, and I wanted
to document it, if she does or not ever get to know me.

I enjoyed making this very much. It took more hours than I could count, but
was so relaxing to make something like this for her. Great Grand Children
are such a blessing from God.

Wednesday, December 26, 2007

TUTORIAL - MAKING A PILLOW FROM NECKTIES


Upon posting a picture of the pillow made of neckties several asked me to write a tutorial about it. So I am posting it now on my blog. If you have any questions, please feel free to ask, I'll be glad to help. It is a very easy pillow to make and yet quite different in that you can make it very masculine!! No fru fru for a man's pillow!!

TUTORIAL - MAKING A PILLOW FROM NECKTIES. By Carol Lindberg

Be sure your neckties are all clean and free from stains, or watch when you use them to cut around any stains that are permanent. Pull the long thread at the back and open the neckties up. Remove the filling, and then press them open flat. (I want to say that I did not remove the lining of the large point and the small point on the other end, as I used those for 'fringe' around the pillow to finish it.)

I cut a piece of muslin about 2" larger than my pillow form. (mine was 16" square). I began with a 5 sided piece of one of the neckties. I used the flip and sew method of piecing. My ties were all shades or figures with blue in them, as it was for my son. I tried to keep it masculine for him!

After piecing and covering the muslin, I used the chevron? stitch on all the seams in a blue thread. Again, I did this to keep it masculine. But it could be made with several colors of ties and colors of CQ stitches also.

The back was a plain piece of blue silk cut the same size as the muslin. Before putting the back on, I placed the ends of the neckties all around the edge of the front of the pillow to be stitched on with the machine. I lapped them over each one just a little, and since I happened to have 4 of the large ends I used one in the middle of each side and the smaller pieces lapped over to finish out each side to the corners. I think I did have to make about 3 of the smaller ones out of the necktie material, as I wanted the fringe to be the same as the fabric pieced on the front. Again, this is optional. I stitched these all four sides on the machine. Then I could put my back on and didn't have to worry about anything moving and the stitching was right there visable where I had stitched the fringe on, so I could stitch the back on and it covered the other stitching. I left one side open about 9 inches in the middle of the side.

Then you can turn it all right side out. I had to roll up the pillow form very tight to insert it in the small 9" opening, but was able to spread it out nicely once it was in there. I used more dacron that I stuffed in the corners and all around the edge of the pillow form to be sure it was all filled and even.

Then just blind stitch up the opening, and your pillow is finished.!! Really easy to do and quickly made. I'm sure I could make another one in less time too. You know the first one is always more time consuming as you are actually making yourself a pattern while you work.

Hope you enjoy making some. It was a hit with my son and the others too. He figured out right away that it was made of neckties from the points around the edge. Also, his favorite color is blue, so that was appealing to him also. Made this Mother feel very good!!!! I have made other things for the girls, and thought I should make something for him with his Mother's stitches on it.

The rest of the men in the family may well get a pillow next year made of neck ties! But I wanted my son to have the whole show this year with his. LOL

Here are pictures of the finished pillow.

Tuesday, December 25, 2007

Christmas Evening and all is quiet!!!

We have had a wonderful Christmas season. Hope all of you have also. I see that it has been quite some time since I have written in my blog, and I hope to do better now that time will not be so pressing.

We have 6" of snow on the ground and 2 more storms coming to bring "signaficant amounts" the weather man says, before this weekend! So if we are snowed in, maybe I will get caught up yet. I am anxious to take the time to read a lot of your blogs also about the holidays.

Melissa and Julia C. have given me nice instructions to help me develop my blog with more color etc. So I intend to get with it, and do that also.

Happy New Year to all!
Carol

Tuesday, December 4, 2007

STILL LEARNING ABOUT THIS BLOGGING BUSINESS!

Well, now I find that I have posted the pictures of our eBay listings on my Needlework blog. I know now to look at which blog I am posting on. Sorry, I do promise to do better and learn by my mistakes!

Our auctions on eBay for this week 12/3/07


Thought I would mention that we listed some very nice miniatures this week. You'll find them on our site on eBay - (seller address) Lindys*ltd. They are from my own collection and am selling more of them now.

Some 'special' dolls listed too! A darling Heubach boy doll, a sculpted (I think) lady doll reminds me of a China head, and some cute little Napco dolls of the month. These are also from my original collection.

Also listed some darling bonnets for dolls (especially antique baby dolls) as they are made out of old linens with lots of 'fru fru' on them. All vintage materials, even the ribbons.

Thanks so all of you, our customers. We do appreciate your business.

Sunday, December 2, 2007

Pardon me please

Please have patience with me on this blog. I have succeeded in getting the Tutorial on it for the Apron made from Hankies. But somehow the pictures did not appear in between the paragraphs of instructions. So I hope you can figure it out. If I ever figure out how to change them, I will. Thank you all!!

TUTORIAL Making an apron from Hankies (1950's)


I remember when my Mother made aprons out of hankies like this. I will enjoy having any of you wanting to make them too.

This is a vintage pattern of a way to make a very pretty and dainty apron from only four hankies! I remember my mother making aprons like this for gifts. Now this was over 50 years ago!! It is still a beautiful apron.

Four hankerchiefs are needed to make each apron. My sample is made of 4 hankies all alike - each is 12" square. It could be made with different colored ones, and different sizes, whatever would be to your liking. The four hankies you choose should all be the same size.

The middle part of the apron is one complete hankie.

The sides are one hankie cut diagonally - and the flounce at the bottom is one hankie. The waist band and ties are made of the 4th hankie.

This picture shows the hankie that has been cut diagonally and used on each side.


However, the flounce should be sewn on to the bottom of the main hankie first, as the side triangular piece This next picture shows how the hankie for the flounce is cut and will fit onto the bottom of the main hankie in the center. Used in this way, this hankie makes the bottom of the front of the apron and lets the points of it and the point of the triangular side become the pointed hem across the bottom of the apron. Just use the very middle of the hankie (in this one it is the middle of the large flower. Please see the pictures.

Sew the flounce to the bottom of the main hankie. You will have 2 sides which fit perfectly onto the triangular side piece.

Cut the 4th hankie into the waistband and the ties. The waistband is 2 1/2" finished, so cut two pieces 3" wide. Sew them together to make on long strip. Sew the waistband strip to the main hankie making the seam in the strip to be at the center of the hankie. Fold it over and stitch it down to the back side.


Cut 2 more 3" strips from that last hankie. Hem the sides. Sew these ties to the ends of the waistband. Here is a picture of the back side - your apron is finished!!

PILLOW I AM MAKING FOR US FOR CHRISTMAS


Having all these neckties brings all kinds of ideas to me. So I pieced this pillow top and am in the process of embellishing it with any 5 minutes of time I can use!!! LOL It measures NOW - 27" x 13". However I intend to make it much larger with a border of ruched fabric all around the 4 sides that will be about 4" wide. Then I will add a 2" strip of fabric all around and then bind it with a ruffled binding. I will also put fringe of beads in each of those seams around the pillow.

I intend to use this in front of our fireplace that we don't use in the living room. It will be about the size of a bed pillow. Then I can remove the bed pillow to store it until Christmas time next year. We now have our flat screen t.v. sitting on an antique wooden box on legs and the top opens like a desk. So the pillow will look nice when it is placed tilted up in front of all that. Fun!


Wednesday, November 14, 2007

eBay for us - Lindys*ltd

I just realized that I don't have the hyperlink to our eBay store on my blog. Here it is.


http://stores.ebay.com/All-About-Your-Dolls

Some doll things I make


I make a lot of things for Chatty Cathy dolls which came out in the 60's. They had a pull string on the back of their neck and they talked when you pulled the string. Mattel made them. There are many collectors out there now for the Chatty dolls as they grew into a whole family of them. These red shoes (postively exactly like the originals) are made of red suede leather and went with the red/white dress with her red corduroy coat with the white fur collar. We have them for sale on eBay along with other things I make for Chatty. (The red shoes are new and will go on eBay on Monday night Nov. 19, 2007.


Tuesday, November 13, 2007


This is a small pillow about 9" x 6". I wanted to practice and make this motif for another project and decided to just go ahead and make a pillow out of the motif. Lots of french knots for flowers. Fun to make.